Best Height for Bandsaw Table
When it comes to setting up bandsaw tables, one of the most important aspects is getting the height just right. After all, if your table isn’t at the correct height, you won’t be able to complete tasks with precision and accuracy. That’s why it’s so important to find out what the best height for a bandsaw table is before beginning any project.
The good news is that there are some general guidelines that can help you decide on an appropriate height for your own setup. In this blog post, we’ll take a look at how to determine the right table height for your particular situation and how factors like user size and type of work can impact what works best in different scenarios. We’ll also discuss some of the potential dangers associated with incorrect heights and provide tips on how to adjust accordingly once you have settled on an ideal level.
With these insights in mind, let’s get started!
If you’re a woodworker, it’s important to have the right height for your bandsaw table. The right height makes it easier to work safely and efficiently on projects. So what is the best height for bandsaw tables?
The optimal height of a bandsaw table depends on several factors, including the size of the table, your own measurements, and how you plan to use it. Generally speaking, most people find that setting their bandsaw table at waist height works best. This allows them to keep their arms in an ergonomically correct position while working with the saw blade.
It also prevents fatigue or discomfort from having to bend over too far when cutting material or making adjustments. For those who are taller than average, they may need to adjust their band saw tables higher so that they don’t have to stoop down as much during operation. Conversely, shorter users may want to lower their band saws so that they don’t strain themselves by reaching up too high during operation.
No matter what your individual needs are when it comes to finding the perfect heights for your band saw tables, make sure you take into consideration all of these factors before making any changes or purchases! Finding an ideal setup will help ensure safety and accuracy every time you go about creating something new with woodworking tools like a band saw!
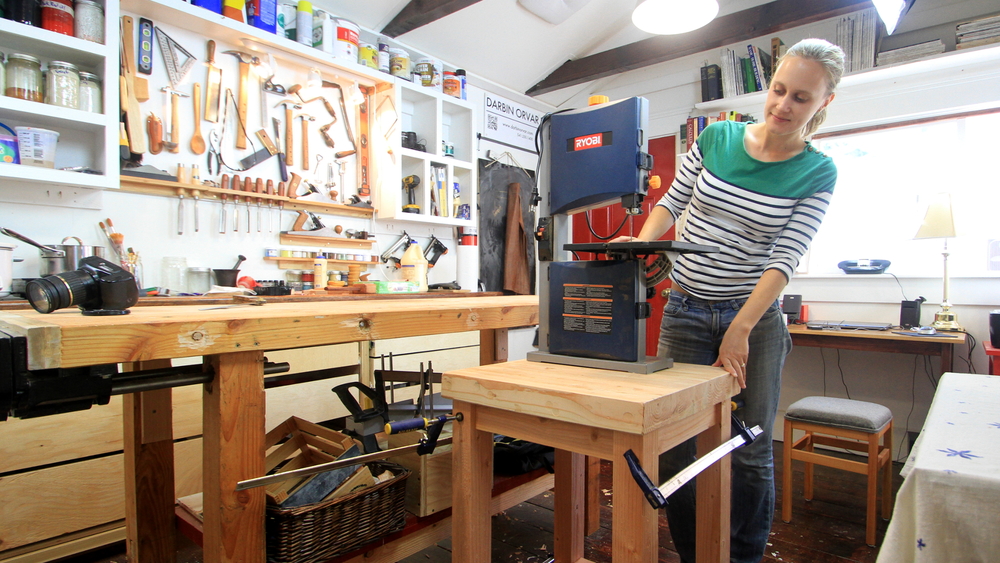
Credit: www.darbinorvar.com
What Height Should My Bandsaw Be At?
Setting up a bandsaw correctly is essential for safety, accuracy, and good performance. If you’re wondering what height your bandsaw should be at, the answer depends on several factors. The first factor to consider is the type of work that will be performed, since different heights are better suited for specific tasks such as cutting thicker materials or making curved cuts.

Generally speaking, a shop-style table saw should have its blade set at 3–4 inches above the surface of the material being cut. This provides ample clearance for both sheet materials and larger pieces like boards. For thin stock like veneers, it may help to lower the blade slightly so that it can make cleaner cuts without splintering along their edges.
When adjusting your bandsaw’s height setting, always ensure that there is enough clearance between the bottom of the blade and the top of the material being cut, this helps prevent kickback when starting a cut and ensures accurate results overall.
Additionally, if you plan on using specialty blades (such as those used in scroll saws), then you’ll need to adjust accordingly based on their thicknesses; thinner blades will require higher settings, while thicker ones may require lowering them further down towards your workpiece surface. The same goes for any additional accessories such as fences or miter gauges: these too, must be properly adjusted before performing any form of operation with your machine!
In terms of ergonomics, having an adjustable base allows users to customize their machines’ heights according to personal preference which ultimately helps reduce fatigue by keeping arms comfortably elevated during use, ideally somewhere between waist level and chest level depending upon one’s stature/build size etcetera; this also means less strain placed upon back muscles from bending over excessively long periods time spent working at odd angles (which can lead serious health issues).
In addition to reducing discomfort during longer projects or repetitive tasks alike, finding just the right balance here makes all the difference!
Overall, though no matter what type of job you’re tackling with your bandsaw, it pays off to make sure everything’s properly aligned & correctly adjusted beforehand, ensure optimal performance each time out, whether simple straight cuts, intricate curves alike – doing so not only improves the end product but a safer experience too!
How High Should the Guard Be on a Bandsaw?
If you’re in the market for a bandsaw, it is important to understand how high the guard should be. The guard provides an essential layer of protection while operating your saw and needs to be set at the proper height. In this blog post, we will discuss why the height of your bandsaw guard matters and what factors determine how tall it should be.
The most important factor when setting the height of your bandsaw guard is safety. When using any kind of machinery, it is critical that all safety precautions are taken seriously. With a bandsaw, having an appropriately sized guard can help protect against injuries from flying debris or being pulled into the blade by clothing or hair.
For this reason, most manufacturers recommend keeping guards as close as possible to the cutting area without interfering with operation.
Generally speaking, most experts suggest setting guards between 3-6 inches above the work surface depending on material thickness and type being cut In addition to protecting users from injury accidents due to operator error are also a concern when working with large power tools like bandsaws; if something becomes wedged in between the blade and table top it can cause serious damage both physically and financially if not addressed quickly enough.
Thus, having adequate clearance between blades and guards helps reduce these dangers significantly as well Finally , keep in mind that certain materials such as plastics require more clearance than others because they have a tendency to melt when exposed too long near heat-generating components like motors bearings, etc.
As such it’s recommended that those typesof projects get extra care when configuring their setup so they dont accidentally suffer damage during use
To recap, appropriate heights for band saws depend on several factors, including type/thickness of material being cut , risk level associated with particular project (i e plastic ), and overall user skill level . Keeping these guidelines in mind can help ensure safe operation, no matter which size band saw you own!
How High Should the Blade Guides Be Set above Your Material Bandsaw?
When it comes to setting up your bandsaw, the blade guide height is one of the most important aspects. The blade guides should be set high enough so that they provide adequate support to the bandsaw blade but not too high that you are creating friction and limiting its effectiveness. The best way to determine how high your blade guides should be set is by trial and error from cutting a few test pieces of wood.
Generally speaking, when using a standard 3/4 inch wide band saw blade for general purpose work such as re-sawing or ripping lumber, you want to have your upper guide about 1/8” above the top edge of the material being cut. This will ensure there’s enough clearance for smooth operation without any binding issues caused by excessive friction on the sides of the kerf (the slot created in wood due to cutting).
If you’re doing finer work where more precision is required such as intricate scrollwork or veneer cuts then lowering your upper guide down closer towards ¼ – ⅛th inch above the material can help achieve cleaner results with less burn marks caused by frictional heat buildup between metal and wood fibers during long cuts.
You also want to make sure that both upper and lower blades are aligned properly before starting any task; otherwise this could cause unnecessary stress on either side resulting in premature wear & tear or even worse – snap offs! It’s worth taking some extra time here if possible because having them misaligned can lead to poor accuracy & quality end product which no one wants!
Lastly, always remember safety first when working with power tools like band saws: wear proper PPE (gloves & goggles) at all times while operating these machines since sharp edges can easily catch skin upon contact, causing serious injury.
How Far above Your Wood Should the Blade Guard Be on the Band Saw?
When using a band saw, it is important to ensure that the blade guard is set at the correct height above your workpiece. This will help protect you from any potential hazards and keep you safe while operating the tool. The general rule of thumb when setting up a band saw for use is to make sure that the blade guard is about one quarter of an inch (6 millimeters) above your workpieces when cutting straight lines.
For curved cuts, increase this distance by about 1/8th of an inch (3 millimeters). If your material has varying thicknesses in different areas then you should adjust accordingly so that all parts are adequately protected with enough clearance from the blade guard.
It’s also important to note that there may be some variation between manufacturers when it comes to exact measurements for proper blade-guard height on band saws, so always consult your user manual before beginning any cut job.
Additionally, if you’re unsure or uncertain about what size adjustments need to be made then don’t hesitate to reach out and ask questions – safety should always come first! Finally, never operate a band saw without its protective guards in place as they play an integral role in preventing accidents and ensuring safe operation of these tools.
Taking extra precautions such as keeping materials properly secured during use can also reduce risk factors associated with using a band saw and help make sure everyone remains safe throughout their projects.
The Perfect Bench Height | what height should your Woodworking Bench
Best Band Saw
If you’re looking for a tool that can provide precise, accurate, and efficient cuts, look no further than the best band saw. The band saw is an essential power tool for any workshop or garage as it offers versatility and precision when cutting through wood, metal and other materials. With so many options available on the market today, it can be difficult to decide which one is right for your needs.
To help narrow down your choices, we’ve rounded up some of the top-rated bandsaws from around the web. The Jet 14″ Deluxe Pro Band Saw packs plenty of features in its compact frame while offering great value for money. This machine has a powerful 1HP motor that runs at 3,450 RPM with adjustable speed settings to get just the right cut each time.
It also comes with a two-speed pulley system which allows you to quickly adjust blade speeds depending on what material you are working with – perfect if you need to make multiple cuts! Plus, this model includes an upper and lower ball bearing guide assembly for smooth operation along with quick release tension levers so changing blades takes no time at all! For those who want something bigger and more robust without breaking the bank then consider buying Rikon 10-305 10 inch Professional Bandsaw instead.
This unit has a larger capacity compared to most smaller models – it can handle workpieces up to 12 inches thick! It’s powered by 1/2 HP motor capable of reaching 4500 FPM (feet per minute) which makes it ideal for ripping softwood boards or resawing lumber easily into thin strips like veneers or laminates.
And thanks to its heavy duty cast iron wheels this machine won’t budge even under intense pressure during operation making sure your cuts stay straight every single time!
Lastly there’s another great option worth considering – Shop Fox W1706 14 Inch Band Saw is just as reliable but slightly less expensive then our previous recommendations yet still built from quality components such as sealed bearings in both wheel arbors so your blade stays sharp longer plus durable steel stand helps keep everything stable during use too!
Its 2 amp motor runs at 2780 FPM giving enough speed needed when making intermediate level projects out of wood plastic composites etc.. What really stands out about this particular models though are its extra large table tilt range between 0°–45° allowing users greater flexibility when setting up complicated angled cuts too!
All three of these machines offer excellent performance and would be suitable depending on what type of job you plan on doing regularly in your shop – whether small scale DIY projects or professional grade carpentry tasks they will all perform well above expectations consistently delivering high quality results each time they are used!
So whatever kind budget constraints may have be sure not compromise since investing into good quality tools always pays off long term especially ones like these highly recommended band saws here today!
.
Conclusion
If you’re looking to get the most out of your bandsaw, it’s important to set up the table at the right height. A good rule of thumb is that the top of your bandsaw table should be level with your waist or slightly below. This will give you better control over your saw and make it easier to work with different materials.
You’ll also want to adjust the table so that it’s not too low or too high, as this can cause strain on your body while operating the saw. The best way to determine what height works best for you is by experimenting until you find a comfortable working position. Once you’ve got that down, all that’s left is some fine-tuning!