How to Move a Bandsaw
Moving a bandsaw can be a daunting task, but with the right preparation it can be done easily. First, gather all the necessary supplies. You will need a dolly, straps, and blankets or furniture pads.
Next, disconnect the bandsaw from any power source and unplug it. Then, remove any loose items from the table top such as sawdust or tools. Finally, tilt the bandsaw back on its stand so that the blade is pointing up and secure it with straps.
- Disconnect the bandsaw from any power sources and remove any blades or other attachments
- Carefully tilt the saw onto its side, being careful not to damage any of the parts
- Use a dolly or other similar device to move the bandsaw to its new location
- Be sure to keep the saw level to avoid damaging it further
- Once in place, carefully set the bandsaw upright and reattach any blades or other attachments
Credit: airsled.com
How Do You Transport a Band Saw?
Assuming you need to move a band saw from one location to another, the best way to transport a band saw is by disassembling it and then reassembling it at the new location. This process can be time-consuming, but it will protect your saw and make moving it much easier.
To start, unplug the band saw from any power source.
Next, remove the blade guard and table insert. Some models also have a light that needs to be removed at this time. With those parts removed, you should be able to see the blade.
Carefully remove the blade by loosening the tension knob and sliding it off of the wheel pulleys. Once the blade is off, you can remove the upper and lower wheels.
The next step is to take apart the stand or cabinet if your model has one.
You will likely need a screwdriver or wrench to loosen some bolts so that you can separate the pieces. If possible, label where each piece goes so that you can more easily put it back together later on. With everything taken apart, you can now safely transport your band saw to its new location.
When you arrive at your destination, begin by putting together the stand or cabinet if applicable. Then reattach all of the wheels before adding back on the blade. Be sure to tension the blade properly before putting back on the guard and table insert.
And finally, plug in your band saw and test it out to make sure everything is working as it should be!
How Do You Move a Table Saw?
Assuming you need to move a table saw from one location to another within your shop or house, here are some tips on how to do so safely:
1. Unplug the saw from its power source. This is probably the most important step, as you don’t want the blade spinning while you’re moving it.
2. Tip the saw onto its side, with the blade facing up. You may want to put something soft underneath it, like a towel, to prevent scratches.
3. Use both hands to lift the saw and carry it to its new location.
If possible, have someone else help you with this so that they can hold one end while you carry the other.
4. Set the saw down in its new spot and plug it back in before using it again.
How Do You Adjust a Bandsaw Fence?
If your bandsaw’s fence isn’t set correctly, your cuts won’t be as precise as they could be. Here’s how to adjust a bandsaw fence:
First, check that the blade is perpendicular to the table by sighting down the length of the blade.
If it’s not, loosen the tension knob and tilt the blade until it’s at a 90-degree angle.
Next, adjust the fence so that it’s parallel to the blade. To do this, loosen the locking knob and move the fence until it’s in line with the blade.
Then retighten the knob to lock everything in place.
Now you’re ready to make some accurate cuts!
How Do You Position a Bandsaw Blade?
When it comes to bandsaw blades, there are a few things you need to keep in mind when positioning them. The first thing to consider is the thickness of the blade. The thicker the blade, the more support it will need from the saw’s frame.
The second thing to consider is the width of the blade. Wider blades are better for cutting thick materials, while narrower blades are better for making intricate cuts.
The third thing to consider is the type of teeth on the blade.
There are two main types of teeth – standard and carbide-tipped. Standard teeth are good for general purpose cutting, while carbide-tipped teeth are designed for cutting harder materials like metals or plastics. Finally, you need to decide which way you want the blade to rotate.
Most bandsaws have either left or right hand rotation, but some models offer both options. Left hand rotation is best for cutting curves, while right hand rotation is better for straight cuts.
Now that you know all of this, let’s talk about how to actually position a bandsaw blade.
First, make sure that the saw is unplugged and that the power switch is in the “off” position. Next, loosen the tension knob on the side of the saw so that you can slide the old blade out (if there is one already installed).
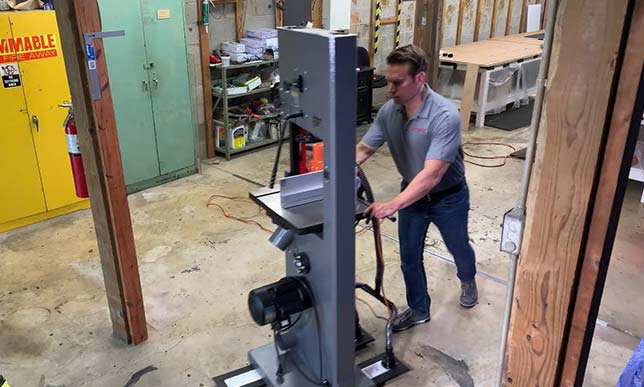
Moving a 1000lb Bandsaw Without A Forklift!
How to Transport a Lathe
If you’re like most people, you probably don’t have a lot of experience transporting a lathe. But if you need to move one, there are some things you should know to make the process go smoothly.
First, it’s important to understand that a lathe is a delicate and complex machine.
It needs to be handled with care to avoid damage. That means taking extra time and precaution when loading it onto a truck or trailer.
1) Remove all loose parts from the lathe before transport.
This includes any tools that may be attached, as well as any accessories such as chucks or steady rests.
2) Secure the lathe bed to the skid or pallet using straps or ratchet binders. The goal is to prevent the bed from moving during transport, which could cause damage.
3) Cover the entire lathe with a tarp or other heavy-duty material before securing it for transport. This will help protect it from weather and road debris.
4) Use multiple straps or chains to secure the lathe in place on the truck or trailer.
Make sure everything is tight and secure before starting your journey.
Adjusting Band Saw Blade Drift
If you’ve ever cut something on a bandsaw, you know that the blade has a tendency to drift off course. This can be frustrating, especially if you’re trying to make precise cuts. The good news is that there are a few things you can do to adjust band saw blade drift.
First, check the tension on your blade. If the blade is too loose, it will definitely drift. Conversely, if the blade is too tight, it can also cause drift.
You want to find that happy medium where the blade is tight enough to stay in place but not so tight that it puts undue stress on the motor or other parts of the saw.
Next, take a look at your guide blocks. These are what keep the blade tracking straight and true.
If they’re not properly aligned, it can cause drift. Make sure they’re parallel with each other and perpendicular to the table surface.
Finally, check your fence for alignment issues.
A misaligned fence will cause the workpiece to bind against it, which can kick the blade off course. Once you’ve checked all of these things and made any necessary adjustments, you should find that your band saw runs much more smoothly and produces straighter cuts.
Moving a Metal Lathe
If you’re moving a metal lathe, there are a few things you need to keep in mind. First, make sure the lathe is properly secured and supported. You don’t want it tipping over during the move.
Second, be careful of sharp edges on the lathe – you don’t want to cut yourself. Third, make sure you have enough space to maneuver the lathe – you don’t want it hitting anything during the move. Finally, take your time and be careful – this is a delicate process and rushing can lead to accidents.
Moving a Hardinge Lathe
Moving a Hardinge Lathe
If you need to move your Hardinge lathe, there are a few things you’ll need to keep in mind. First, be sure to disconnect all power sources before attempting to move the machine.
Next, you’ll want to secure any loose parts or accessories so they don’t become damaged during the move. Finally, be sure to use proper lifting techniques when moving the lathe – using a forklift or other machinery is generally the best way to go. With these tips in mind, you should be able to safely and successfully move your Hardinge lathe!
Bandsaw Drift Myth
There’s a lot of talk on the internet about “band saw drift.” But what is it, really? And is it something you need to worry about?
Drift is simply the tendency of the blade to veer off course as it cuts. It’s caused by a number of factors, including blade tension, inaccuracies in the saw table, and even the way you’re holding the workpiece.
Most band saws have some degree of drift, but it’s usually not enough to be a problem.
In fact, many woodworkers actually use drift to their advantage, deliberately cutting slightly skewed pieces that can add interest to a project.
However, if your band saw has excessive drift or if it’s constantly drifting in one direction, that can be an issue. It can make cuts difficult or even dangerous.
If you’re having trouble with Drift, try these tips:
– Check your blade tension and make sure it’s properly adjusted. – Inspect your saw table for any warping or damage that could cause inaccuracy.
– Make sure you’re holding the workpiece firmly against the fence while cutting. – Use a push stick or other safety device to keep your hands away from the blade while cutting. – If all else fails, consider getting a new band saw!
Excessive Drift is often indicative of bigger problems with the machine itself.
Laguna Bandsaw Drift
When it comes to bandsaws, one of the most frustrating things can be dealing with drift. Drift is when the blade starts to cut at an angle, rather than straight. This can ruin a perfectly good piece of wood, and is especially frustrating if you’re trying to make precise cuts.
There are a few different things that can cause drift, but the most common is simply having a dull blade. When the blade is dull, it doesn’t cut as cleanly and can start to wander. The other main cause of drift is having the tension on the blade too loose.
This causes the blade to flex more, which again leads to it cutting at an angle.
The best way to avoid drift is to make sure you have a sharp blade and that it’s properly tensioned. If you’re still having trouble, there are a few tricks you can try.
One is to use a guide – either a fence or another piece of wood – clamped next to your workpiece. This will help keep the blade moving in a straight line. Another trick is to slowly increase the speed at which you’re cutting; this often helps stabilize the blade and prevents it from drifting.
If you’re constantly fighting against drift, it might be time for a new bandsaw. Some models are simply better at staying true than others.
How to Move a Large Planer
When it comes time to move a large planer, there are a few things you need to keep in mind. First of all, you’ll need to have a few people on hand to help with the lifting and carrying. Second, you’ll need to make sure that the path is clear and there are no obstacles in the way.
And finally, you’ll need to be careful not to damage the planer or any of its parts during the move.
With those things in mind, let’s get started. The first step is to disconnect the power cord from the outlet.
Once that’s done, you can start removing any clamps or other attachments that are holding the planer in place. Next, lift one end of the planer off of its base and carry it over to where you want to put it down. Be careful not set it down too hard, as this could damage the blades or other parts of the machine.
Repeat this process for the other end of the planer until it’s completely free from its base. At this point, you can carry it over to its new location and set it down gently. Once it’s in place, you can reconnect all of the clamps and attachments, as well as plugging back in the power cord.
And that’s all there is to moving a large planer!
How to Move Heavy Objects Without a Forklift
If you need to move a heavy object but don’t have access to a forklift, there are still ways that you can get the job done. With a little bit of planning and some creative thinking, you can safely move any heavy object without damage or injury.
1. Gather Your Supplies
Before you start trying to move the heavy object, it’s important to gather all of the supplies that you’ll need. This includes things like furniture dollies, straps, and other tools that will help make the process easier. You may also want to enlist the help of another person to assist with the lifting and moving process.
2. Assess The Object’s Weight And Size
Once you have all of your supplies gathered, take a moment to assess the weight and size of the object that needs to be moved. This will give you a better idea of how much effort will be required to move it and what type of equipment will be necessary.
If possible, try to find out exactly how much the object weighs before starting the moving process.
3. Lift The Object Carefully Onto A Dolly
If possible, lift the heavy object onto a dolly or other type of rolling platform before attempting to move it.
This will make it much easier (and safer) to transport across distances. Be sure to use proper lifting techniques when placing the object onto the dolly so that you don’t injure yourself in the process. If needed, ask someone else for assistance with this step.
Conclusion
If you’re looking to move your bandsaw, there are a few things you need to keep in mind. First, make sure the saw is unplugged and that the blade is disengaged. Next, raise the blade guard and remove any debris from the table.
Once the table is clear, you can use a dolly or hand truck to move the saw. If you’re using a dolly, be careful not to tip the saw forward; if you’re using a hand truck, make sure the wheels are locked before moving. Finally, once you’ve moved the saw to its new location, lower the blade guard and engage the blade before plugging it in.
The Four Best Saw To Cut 4×4 Reviews & Expert Guide
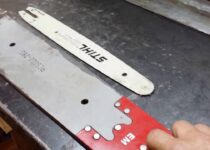
How to Straighten Chainsaw Bar