Add Riving Knife to Table Saw
Most table saws come with a standard rip fence, miter gauge, and blade guard system- but they’re often lacking one important safety feature; a riving knife. A riving knife is a small, secondary blade that sits just behind the main cutting blade. Its purpose is to prevent the kickback of the workpiece in case of binding.
If your saw didn’t come with a riving knife, or you lost it (they’re easy to misplace), there’s no need to worry. You can easily make your own with some scrap wood and a few basic tools. In this post, we’ll show you how to make a riving knife for your table saw in just minutes.
If you’re like most woodworkers, you probably have a table saw in your shop. And if you’re like most table saw users, you probably don’t have a riving knife. A riving knife is a small, sharp blade that sits just behind the saw blade.
It’s used to help prevent kickbacks, and it’s an important safety feature for any table saw.
If you’re not familiar with kickbacks, they occur when the spinning blade of the saw catches on something and kicks it back towards the user. This can be extremely dangerous, and a riving knife helps to prevent it from happening.
Adding a riving knife to your table saw is relatively easy to do, and it’s well worth the effort for the added safety it provides. If you’re not sure how to do it, there are plenty of videos and articles online that can show you how. Once you’ve got your new riving knife installed, make sure to use it whenever you’re using your table saw.
It could save your life someday!
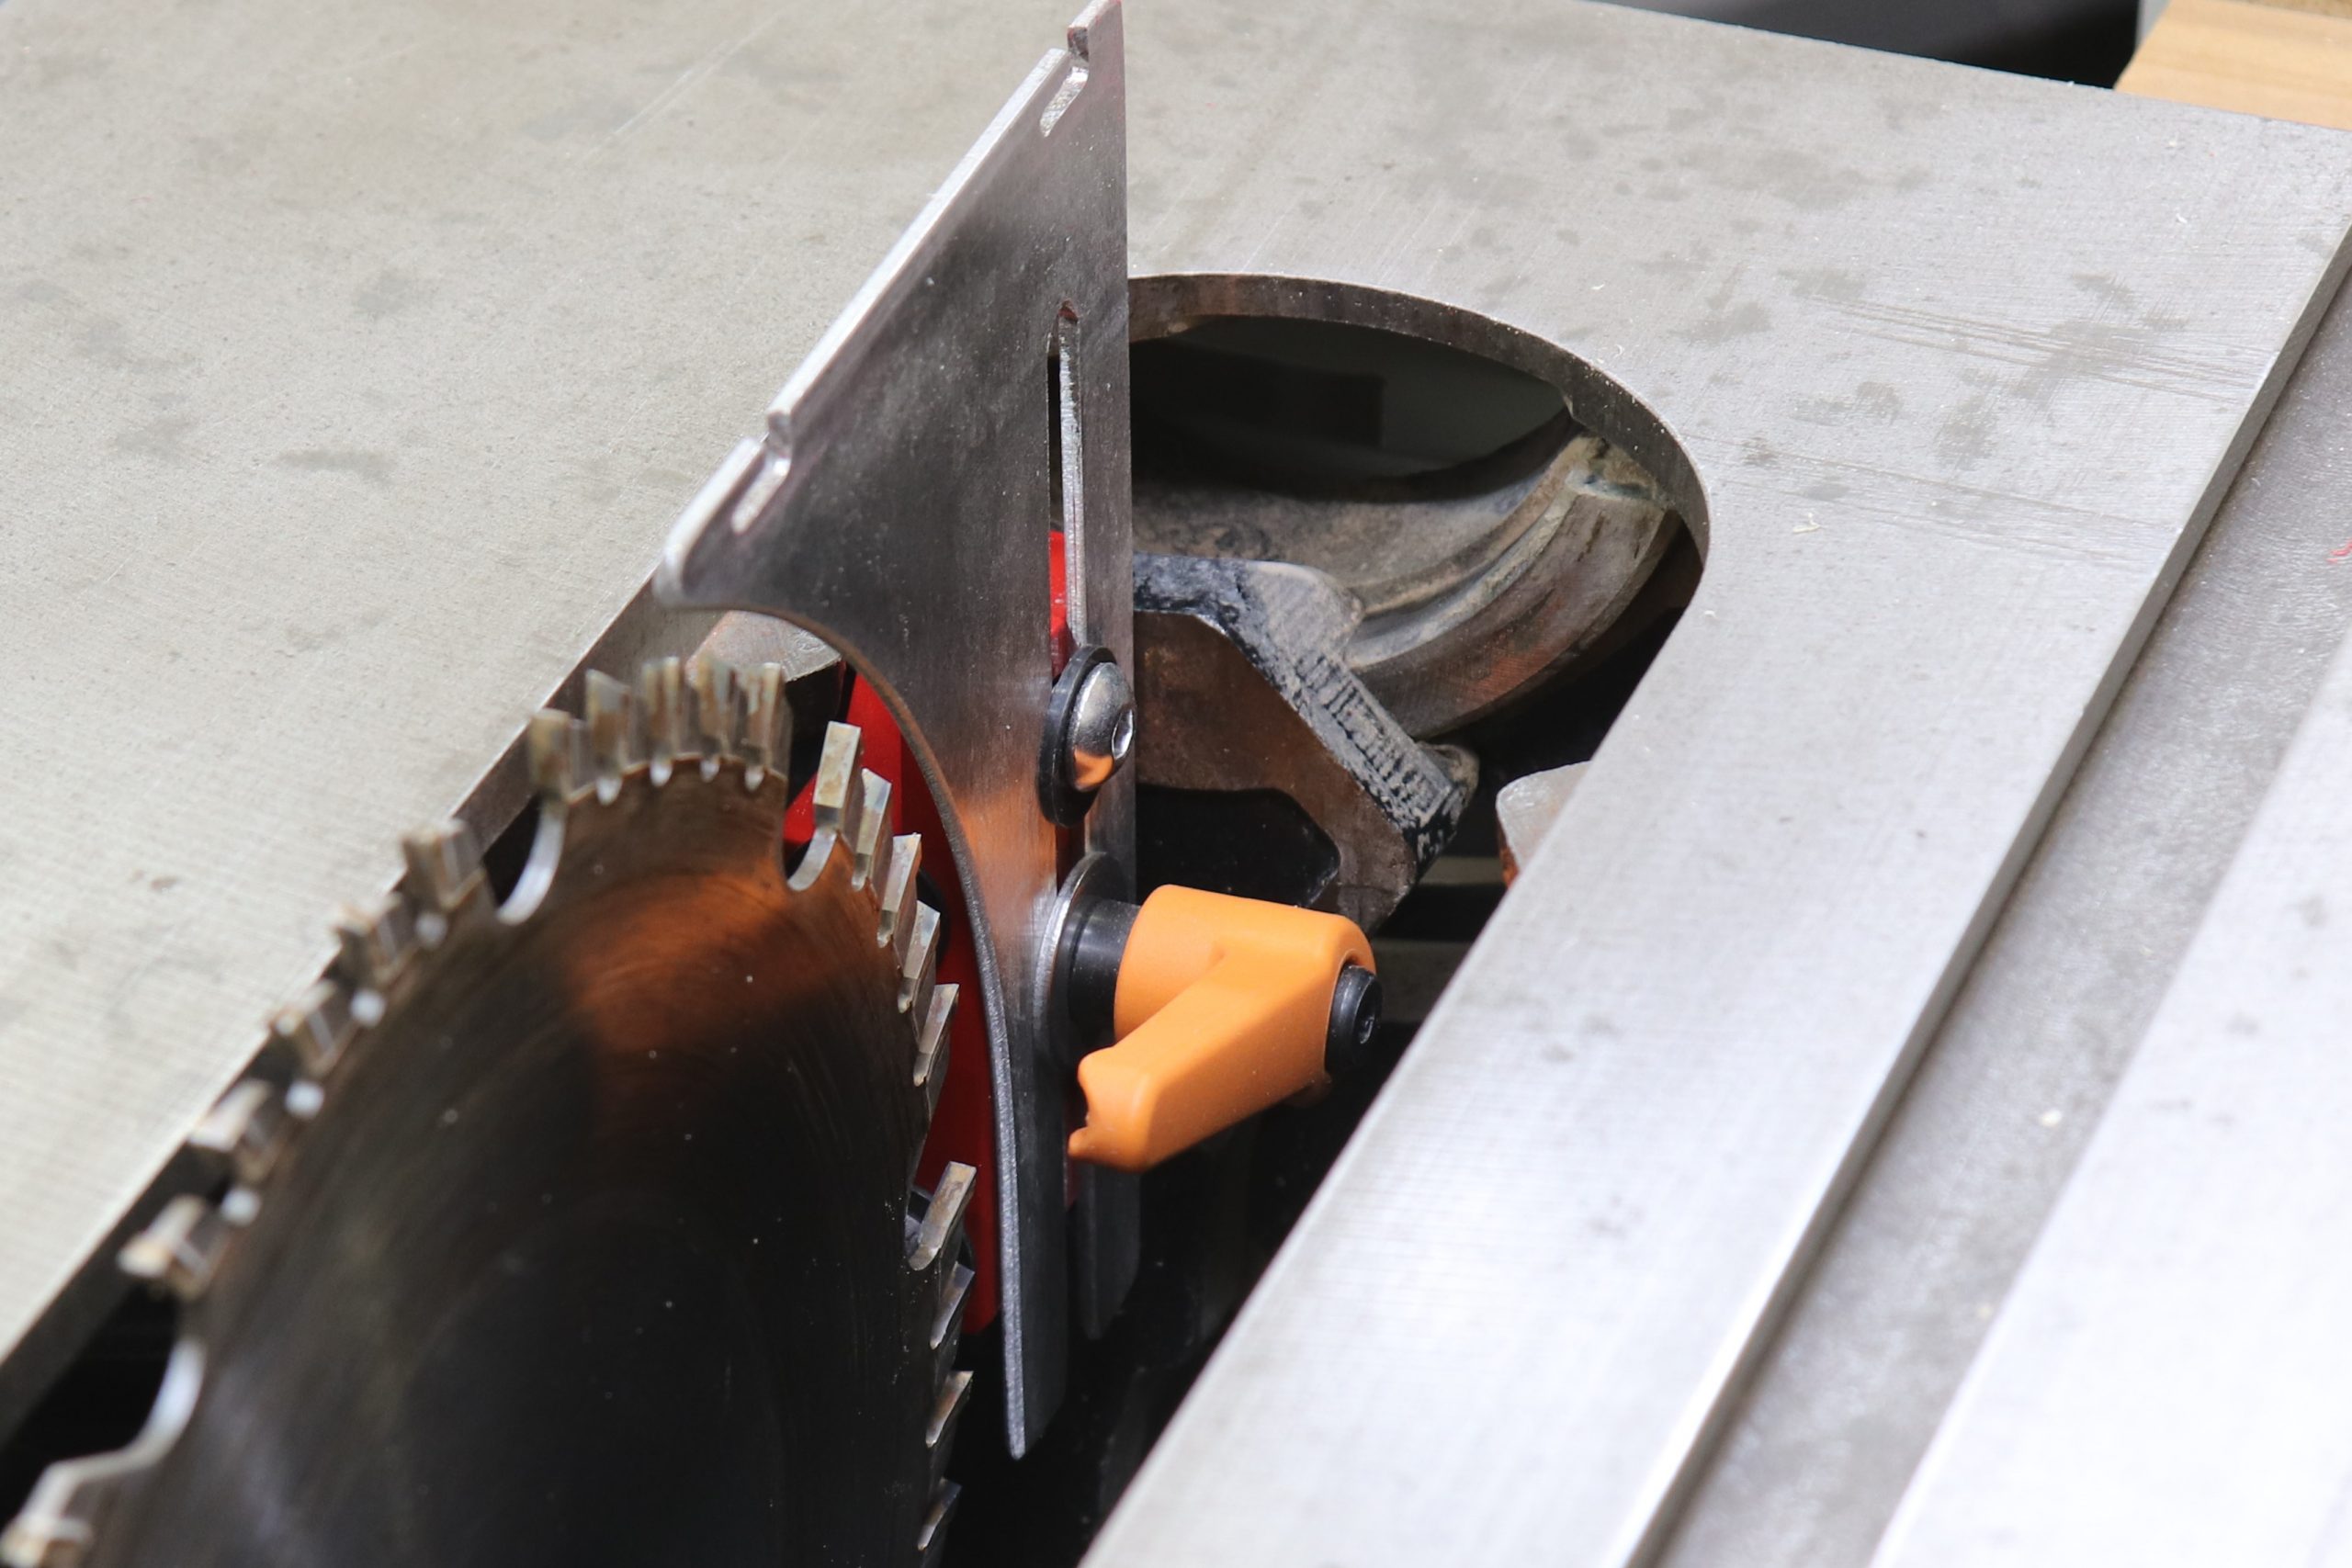
Adding Riving Knife to Old Craftsman Table Saw
If you’re looking to upgrade your Craftsman table saw, one of the best things you can do is add a riving knife. This will help prevent kickback and make your saw safer to use.

Here’s a step-by-step guide on how to do it:
1. Remove the throat plate from your saw. You’ll need to unscrew the four screws that hold it in place.
2. Cut a piece of plywood or hardboard that’s about 2″ wide and 12″ long. This will be used as a spacer between the blade and the riving knife.
3. Drill two holes in the spacer, spaced about 3/4″ apart. These holes will be used to mount the riving knife.
4. Place the spacer behind the blade, with the holes lined up with those on the blade guard bracket. Insert bolts through the holes and tighten them down so that the spacer is snug against the bracket.
5. Position the riving knife so that it’s flush with the back of the blade, then tighten down its mounting bolts until it’s secure.
Be careful not to overtighten – you don’t want to damage either component!
Credit: www.wwgoa.com
Can a Riving Knife Be Added to a Table Saw?
In short, yes. A riving knife can be added to a table saw, provided that the table saw is equipped with a compatible throat plate. Riving knives are designed to prevent kickback by providing support for the workpiece behind the blade.
When properly installed and used, a riving knife can significantly reduce the risk of kickback and other injuries.
Can I Add a Riving Knife to My Delta Table Saw?
Adding a riving knife to your Delta table saw is a great way to improve the safety and performance of your saw. There are a few things to consider when adding a riving knife, such as the type of blade you use and the size of the throat plate opening.
When choosing a riving knife, be sure to select one that is compatible with your saw’s blade.
The riving knife should also be the same width as the kerf of your blade. For example, if you have a 10″ wide blade, you will need a 10″ wide riving knife.
The size of the throat plate opening is another important consideration.
The throat plate opening should be large enough to allow the riving knife to pass through without contacting the sides of the opening. A good rule of thumb is to make sure that the throat plate opening is at least 1/8″ wider than the kerf of your blade.
Installing a riving knife on your Delta table saw is relatively easy.
First, remove the existing throat plate by loosening the screws that hold it in place. Next, insert the riving knife into place and secure it with the included hardware. Finally, re-install the throat plate and tighten all screws until snug.
Adding a rving knife to your Delta table saw can help improve both safety and performance.
How Do You Make a Table Saw Riving Knife?
A riving knife is a safety device that is fitted to the blade of a table saw. It helps to prevent kickback by keeping the cut material from binding between the blade and the fence. A riving knife must be positioned so that it is just behind the cutting edge of the blade, and it should be set at the same height as the blade itself.
Most modern table saws come with a riving knife already installed, but you may need to install one yourself if you are using an older model or if you are upgrading your saw to include this safety feature. Installing a riving knife is not a difficult task, but it is important to make sure that it is done correctly in order to avoid any accidents.
First, you will need to remove the throat plate from your table saw.
This will give you access to the arbor nut, which holds the blade in place. Loosen this nut using a wrench, and then remove the blade from the arbor.
Next, position your riving knife so that it is just behind the cutting edge of the blade (as mentioned above).
Then, use a clamp or another similar device to hold it in place while you reinstall the throat plate. Be sure that boththe throat plate andthe riving knife are securely tightened before moving on.
Now all that’s left to do is reattachthe blade onto its arbor and tighten everything back up again.
You can now test out your new riving knife by making some practice cuts!
Is a Splitter As Safe As a Riving Knife?
A riving knife is a stationary piece of metal that protrudes from the back of the throat plate on a table saw. Its purpose is to prevent kickback by binding with the wood as it’s being cut and stopping it from traveling back toward the operator. A splitter is very similar to a riving knife in that it also binds with the wood to help prevent kickback, but it’s not attached to the saw.
It’s simply inserted into a kerf (the groove cut by the blade) after the cut has been started.
So, which is safer? That depends on how you use them.
If you’re careful and keep your fingers well away from the blade, either one will work fine. But if you’re not paying attention or get too close to the blade, a splitter can be dangerous because it can easily be pushed out of position by contact with the spinning blade. A riving knife, on the other hand, is securely attached to the saw so it can’t be pushed out of place.
In general, then, a riving knife is probably safer than a splitter – but only if you’re using it correctly. Pay attention to what you’re doing and keep your fingers clear of the blade, and either one will work just fine.
Conclusion
Adding a riving knife to your table saw is a great way to improve the safety and accuracy of your cuts. A riving knife is a small piece of metal that helps to keep the blade from binding in the workpiece. It also helps to prevent kickback, which can be a serious safety hazard.
Adding a riving knife is a relatively simple process, and it can make a big difference in the quality of your cuts.
Can I Use a Smaller Blade on My Miter Saw

Are All Chainsaw Blades the Same